graded assignments
Create un
For example, you might assign reading for homework. You want this assignment to appear in students' To Do widget in the Student portal, but you will not enter a score for the assignment.
Note that you can copy assignments to quickly create duplicates, and you can import assignments from another of your class sections or from previous years.
To create an un
- Log on to the Staff view.
- Do one of the following:
- Click the
- Click the Planner tab, and select a class. Click in the date the assignment is due, and then select Add Ungraded Assignment.
-
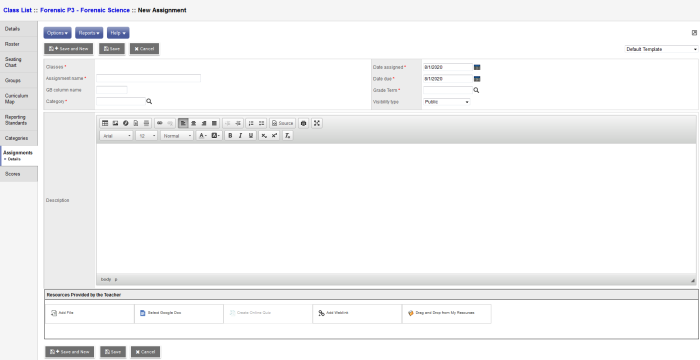
- Enter information in the following fields:
-
Field
Description
Classes
The classes this assignment is created for appear here after you click Save.
Assignment Name
Type a name for the assignment. This name appears in the To Do widget.
GB column name
This field is optional. Type the name that you will use to identify this assignment on your Scores page. Category
Select the assignment category.
Date assigned
This field defaults to today's date. To change the date, click
 .
.Note: You can move assignment dates forward or backward for a course section. This is helpful if a day of school is canceled because of weather, or a last-minute assembly is scheduled for an upcoming school day. If you change an assignment’s 'date assigned' so that it is ahead of the date due, the date due automatically updates to match the new date assigned. Date due
This field defaults to today's date. To change the date, click
.Grade Term
The system enters the grade term based on the date you enter at the Date due field. You can change this value.
Note: If a grade term is locked, you cannot enter it here or select it from the Grade Term pick list. Visibility Type
This value comes from the Visibility type you defined for the assignment category. Change the value, if needed. If your students and their families use the Student and Family portals, the value you select determines what they can see for assignments in this category. Select one of the following:
- Private: Assignments do not appear in the Student or Family portals.
- Public: Assignments and
- Public– no grades: Assignments appear in portals, but
Description
Use the text editor to type a description of the assignment. The description can include links to the web, and any other feature available in the text editor.
Linked or All drop-down If you are creating an assignment for a class that is not linked with other sections, this drop-down defaults to All. If you want to associate this assignment with other classes, select their checkboxes under the Also add this assignment to classes section.
If you are creating an assignment for a linked class section, this drop-down defaults to Linked. If the Add to all linked classes by default
Resources Provided by the Teacher
Click Add File, Select Google Doc or Add Weblink to attach a file, Google Doc or weblink to this assignment. Aspen automatically adds the file or weblink to your Uploads folder in My Resources.
To add a resource from your personal course materials to the assignment, click Drag and Drop from My Resources. The My Resources pop-up appears. Find the resource you want to add, drag it to the drop area in the Resources Provided by the Teacher section, and drop it.
- To prevent a student from receiving this assignment, click the Students sub-tab. Then, select the student's name, and click Exclude. Use the Exclude, Exclude All, Include and Include All buttons as needed, so that only the students who should receive the assignment appear in the Included Students column.
Note: When you exclude a student from receiving an assignment, he will not see it in the To Do widget or on the assignments list (Academics > Assignments) in the Student portal.
- Do one of the following:
- If creating the assignment in the Planner, click Save.
- If creating the assignment on the
Note: An administrator can merge your class sections if they occur during the same class period. You manage assignments from the "primary" course section (